×
- Hello
- Login or Register
- Quick Links
- Live Chat
- Track Order
- Parts Availability
- RMA
- Help Center
- Contact Us
- Shop for
- Mitsubishi Parts
My Garage
My Account
Cart
Genuine Mitsubishi Cordia Tie Rod End
Steering Rod End- Select Vehicle by Model
- Select Vehicle by VIN
Select Vehicle by Model
orMake
Model
Year
Select Vehicle by VIN
For the most accurate results, select vehicle by your VIN (Vehicle Identification Number).
1 Tie Rod End found

Mitsubishi Cordia Outer Tie Rod Part Number: MB912519
$72.79 MSRP: $101.10You Save: $28.31 (28%)Ships in 1-2 Business Days
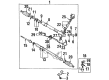
Mitsubishi Cordia Tie Rod End
OEM Tie Rod End can boast superior quality and long-term durability. Each part meets strict factory specs and passes careful checks in production. So you'll get Tie Rod End with long-lasting strength and an exact fit. If you need OEM Mitsubishi Cordia Tie Rod End, the online store is the ideal place. The store carry a wide range of genuine Mitsubishi Cordia parts at the highly competitive prices. You'll enjoy a simple and no-hassle shopping experience. You'll get unbeatable prices and fast delivery service. You'll get the manufacturer's warranty and a straightforward return policy. Shop with confidence and keep your car in top condition.
Mitsubishi Cordia Tie Rod End Parts Questions & Experts Answers
- Q: How to remove and install the tie rod end on Mitsubishi Cordia?A:To remove and install the tie rod end on a Starion, first raise the car and securely support it at the front with axle stands, then remove the front wheels. Loosen the adjusting nut for the tie rod end and remove the cotter pin for the castellated nut retaining the ballstud to the steering knuckle, loosening the nut without removing it. Use a fork-type ballstud remover to pull the ballstud out of the steering knuckle, then remove the nut while counting the turns to unscrew the tie-rod end for alignment restoration. Install the inner end of the new tie rod, turning it the same number of turns to restore the original position, then install the ballstud into the steering knuckle, torque the castellated nut to 26 ft. lb., and install a new cotter pin after aligning the castellations with the hole in the stud. Finally, torque the inner tie rod nut to 37-39 ft. lb. For Cordia, Tredia, Mirage, and Galant, raise the car and support it securely at the front with axle stands, then remove the front wheels. Remove the cotter pin and the ballstud retaining nut, using a vice-like tool to press the ballstud down and out of the steering knuckle. Loosen the nut retaining the tie-rod end to the tie rod from the steering box with a backup wrench, unscrewing the tie-rod end while counting the turns. Install the new tie rod end in reverse order, torque the castellated nut retaining the ballstud to 17 ft. lb. (or 11 ft. lb. for Galant), aligning the castellations with the hole in the stud before installing a new cotter pin, and torque the inner nut to 36-40 ft. lb.


