×
- Hello
- Login or Register
- Quick Links
- Live Chat
- Track Order
- Parts Availability
- RMA
- Help Center
- Contact Us
- Shop for
- Mitsubishi Parts
My Garage
My Account
Cart
Genuine Mitsubishi Mirage Oil Pressure Switch
Oil Pressure Sender Switch- Select Vehicle by Model
- Select Vehicle by VIN
Select Vehicle by Model
orMake
Model
Year
Select Vehicle by VIN
For the most accurate results, select vehicle by your VIN (Vehicle Identification Number).
4 Oil Pressure Switches found

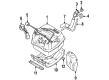
Mitsubishi Mirage Oil Pressure Sending Unit Part Number: MD092660
$70.56 MSRP: $98.00You Save: $27.44 (28%)Ships in 1-2 Business Days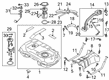
Mitsubishi Mirage Oil Pressure Sending Unit Part Number: MN163743
$26.84 MSRP: $34.95You Save: $8.11 (24%)Ships in 1-2 Business Days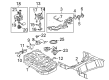
Mitsubishi Mirage Oil Pressure Sending Unit Part Number: 1258A003
$31.44 MSRP: $40.94You Save: $9.50 (24%)Ships in 1-2 Business Days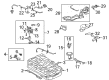
Mitsubishi Mirage Oil Pressure Sending Unit Part Number: 1258A002
$31.99 MSRP: $41.66You Save: $9.67 (24%)Ships in 1-2 Business Days
Mitsubishi Mirage Oil Pressure Switch
OEM Oil Pressure Switch can boast superior quality and long-term durability. Each part meets strict factory specs and passes careful checks in production. So you'll get Oil Pressure Switch with long-lasting strength and an exact fit. If you need OEM Mitsubishi Mirage Oil Pressure Switch, the online store is the ideal place. The store carry a wide range of genuine Mitsubishi Mirage parts at the highly competitive prices. You'll enjoy a simple and no-hassle shopping experience. You'll get unbeatable prices and fast delivery service. You'll get the manufacturer's warranty and a straightforward return policy. Shop with confidence and keep your car in top condition.
Mitsubishi Mirage Oil Pressure Switch Parts Questions & Experts Answers
- Q: How to check the Oil Pressure switch, oil pressure gauge, and sending unit on Mitsubishi Mirage?A:In order to measure the oil pressure gauge, first remove the electrical connector from the gauge unit. Then place a suitable test light (12V-3.4W) to the ground side of the harness side connector. Switch the ignition to the ON position and take note of the test light and gauge: if the test light is flashing or lit and the oil pressure gauge needle is moving, the components are working correctly. If the test light works but the gauge doesn't, then replace the gauge. If neither the Tester lamps nor the gauge works out, check the oil pressure gauge circuit and change it if needed. For the Oil Pressure Switch check, disconnect the electrical harness connector from the Oil Pressure Switch and remove the unit from the oil filter head. Use an ohmmeter to test for conductivity between the terminal and the Oil Pressure Switch body, and replace the Oil Pressure Switch if there is no conductivity. Place a thin wedge through the Oil Pressure Switch oil hole and slightly push it. Measure resistance which should show in conductivity. Substitute the Oil Pressure Switch if there's conductivity as the wedge is pushed. For proper functioning, conductivity should not be present when applying a pressure of 71 psi through the oil hole. Furthermore, inspect the air pressure for leakage; in the presence of leakage, the diaphragm is damaged and the Oil Pressure Switch requires replacement. To remove and install the Oil Pressure Switch. Disconnect the negative battery cable, raise and support the vehicle, disconnect the electrical harness connector from the Oil Pressure Switch and remove the Oil Pressure Switch from the oil filter head. For the installation process, apply a thin bead of sealant to the oil pressure Oil Pressure Switch's threaded area but ensure that sealer does not touch the end of the threaded area. Without overtightening, install and tighten the Oil Pressure Switch to 8 ft-lbs (12 Nm). Reinstall the wiring harness connector to the Oil Pressure Switch, lower the vehicle and reconnect the negative battery cable.
Related Mitsubishi Mirage Parts
 Mitsubishi Mirage Ignition Coil
 Mitsubishi Mirage Body Control Module
 Mitsubishi Mirage Brake Light Switch
 Mitsubishi Mirage Clock Spring
 Mitsubishi Mirage Door Jamb Switch
 Mitsubishi Mirage Hazard Warning Switch
 Mitsubishi Mirage Relay
 Mitsubishi Mirage Temperature Sender
 Mitsubishi Mirage TPMS Sensor
 Mitsubishi Mirage Vehicle Speed Sensor
 Mitsubishi Mirage Windshield Wiper Switch
 Mitsubishi Mirage Wiper Linkage