×
- Hello
- Login or Register
- Quick Links
- Live Chat
- Track Order
- Parts Availability
- RMA
- Help Center
- Contact Us
- Shop for
- Mitsubishi Parts
My Garage
My Account
Cart
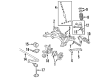
Genuine Mitsubishi Montero Wheel Hub
Wheel Axle Hub- Select Vehicle by Model
- Select Vehicle by VIN
Select Vehicle by Model
orMake
Model
Year
Select Vehicle by VIN
For the most accurate results, select vehicle by your VIN (Vehicle Identification Number).
3 Wheel Hubs found

Mitsubishi Montero Hub & Bearing Assembly Part Number: MR418068
$251.06 MSRP: $354.60You Save: $103.54 (30%)Ships in 1-2 Business Days

Mitsubishi Montero Front Hub & Bearing Part Number: 3880A024
$318.38 MSRP: $449.68You Save: $131.30 (30%)Ships in 1-2 Business Days
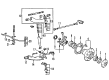
Mitsubishi Montero Front Hub Part Number: MB891088
$201.45 MSRP: $272.97You Save: $71.52 (27%)Ships in 1-2 Business Days
Mitsubishi Montero Wheel Hub
OEM Wheel Hub can boast superior quality and long-term durability. Each part meets strict factory specs and passes careful checks in production. So you'll get Wheel Hub with long-lasting strength and an exact fit. If you need OEM Mitsubishi Montero Wheel Hub, the online store is the ideal place. The store carry a wide range of genuine Mitsubishi Montero parts at the highly competitive prices. You'll enjoy a simple and no-hassle shopping experience. You'll get unbeatable prices and fast delivery service. You'll get the manufacturer's warranty and a straightforward return policy. Shop with confidence and keep your car in top condition.
Mitsubishi Montero Wheel Hub Parts Questions & Experts Answers
- Q: What are the essential steps and precautions for removing and installing the Wheel Hub on 4WD on Mitsubishi Montero?A:The removal and installation of the hub in 4WD models require special tools and considerable care so before commencing the task it is best to have a good grasp of the entire process or have it done by a dealer service department or a repair shop. Start by lifting the front of the car and making sure to place it firmly on jackstands. Always remember to keep the caliper hose attached and always keep the caliper suspended by means of a stiff wire in order to prevent strain. In the case of a manual free-wheeling hub, rotate the control handle to the free position, then remove the hub cover and take off the free-wheeling hub assembly by unscrewing the snap-ring and bolts. In auto-free-wheeling hub designs, unscrew the hub cover, open the O-ring, snap-ring and spacer/shim and disassemble the hub assembly. Unscrew the lockwasher and loosen the locknut with a special socket and breaker bar then loosen the hub on the spindle. In order to repack the bearings, you are to pry out the grease seal, remove the inner wheel bearing, clean everything with solvent and check on damages. Apply high-temperature grease to the bearings, grease the spindle and bearing race, and place the inner bearing and new seal. To install, simply slide the hub onto the spindle, fit the outer wheel bearing and pre-load the bearing with a torque wrench. Different model years have specific procedures to follow in terms of locknut adjustments, installing hub assembly, and verifying hub turning force. Lastly, re-attach the brake caliper and wheel, then bring the vehicle down to the ground.

Related Mitsubishi Montero Parts
 Mitsubishi Montero Coil Spring Insulator
 Mitsubishi Montero Coil Springs
 Mitsubishi Montero Crossmember Bushing
 Mitsubishi Montero Lateral Link
 Mitsubishi Montero Radius Arm
 Mitsubishi Montero Steering Knuckle
 Mitsubishi Montero Sway Bar Bracket
 Mitsubishi Montero Sway Bar Link Bushing
 Mitsubishi Montero Track Bar
 Mitsubishi Montero Trailing Arm
 Mitsubishi Montero Wheel Bearing Dust Cap
 Mitsubishi Montero Wheel Seal