×
- Hello
- Login or Register
- Quick Links
- Live Chat
- Track Order
- Parts Availability
- RMA
- Help Center
- Contact Us
- Shop for
- Mitsubishi Parts
My Garage
My Account
Cart
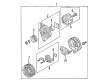
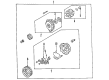
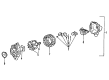
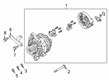
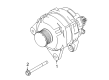
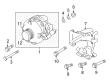
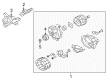
Genuine Mitsubishi Alternator
Generator- Select Vehicle by Model
- Select Vehicle by VIN
Select Vehicle by Model
orMake
Model
Year
Select Vehicle by VIN
For the most accurate results, select vehicle by your VIN (Vehicle Identification Number).
15 Alternators found

Mitsubishi Alternator Part Number: M163999D
$251.27 MSRP: $354.90You Save: $103.63 (30%)Ships in 1-2 Business DaysProduct Specifications- Other Name: Remanufactured Alternat; Alternator Remanufactured; Remanufactured Alternator

Mitsubishi Alternator Part Number: M984944D
$213.10 MSRP: $288.75You Save: $75.65 (27%)Ships in 1-2 Business DaysProduct Specifications- Other Name: Remanufactured Alternat

Mitsubishi Alternator Part Number: M313392D
$226.36 MSRP: $306.73You Save: $80.37 (27%)Ships in 1-2 Business DaysProduct Specifications- Other Name: Remanufactured Alternat; Alternator Remanufactured; Remanufactured Alternator


Mitsubishi Alternator Part Number: MD375853
$680.84 MSRP: $887.66You Save: $206.82 (24%)Ships in 1-2 Business DaysProduct Specifications- Other Name: Alternator Assembly; Alternator Remanufactured; Remanufactured Alternator
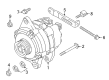
Mitsubishi Alternator Part Number: 1800A064
$878.36 MSRP: $1145.18You Save: $266.82 (24%)Ships in 1-2 Business DaysProduct Specifications- Other Name: Alternator Assembly; Alternator Remanufactured; Remanufactured Alternator

Mitsubishi Alternator Part Number: 1800A578
$972.98 MSRP: $1268.55You Save: $295.57 (24%)Ships in 1-2 Business DaysProduct Specifications- Other Name: Alternator Assembly
Mitsubishi Alternator Part Number: 1800A577
$995.04 MSRP: $1297.31You Save: $302.27 (24%)Ships in 1-2 Business DaysProduct Specifications- Other Name: Alternator Assembly
Mitsubishi Alternator Part Number: 1800A499
$1022.54 MSRP: $1333.17You Save: $310.63 (24%)Ships in 1-2 Business DaysProduct Specifications- Other Name: Alternator Assembly


Mitsubishi Alternator Part Number: 1800A316
$1039.12 MSRP: $1354.78You Save: $315.66 (24%)Ships in 1-2 Business DaysProduct Specifications- Other Name: Alternator Assembly, 85A; Remanufactured Alternator

Mitsubishi Alternator Part Number: 1800A575
$714.01 MSRP: $930.91You Save: $216.90 (24%)Ships in 1-2 Business DaysProduct Specifications- Other Name: Alternator Assembly
- Replaced by: 23100WF00P

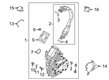
Mitsubishi Generator Assembly Part Number: 9487A013
$3028.09 MSRP: $3665.97You Save: $637.88 (18%)Ships in 1-2 Business DaysProduct Specifications- Other Name: Generator Unit, HEV; Alternator; Generator

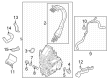
Mitsubishi Generator Assembly Part Number: 9487A051
$4965.49 MSRP: $6011.49You Save: $1046.00 (18%)Ships in 1-2 Business DaysProduct Specifications- Other Name: Generator Unit, HEV; Alternator; Generator

Mitsubishi Alternator Part Number: 23100W440P
$854.37 MSRP: $1113.91You Save: $259.54 (24%)Ships in 1-2 Business DaysProduct Specifications- Other Name: Alternator Assembly
- Replaces: 23100W370P
Mitsubishi Alternator Part Number: 23100W110P
$1166.03 MSRP: $1520.25You Save: $354.22 (24%)Ships in 1-2 Business DaysProduct Specifications- Other Name: Alternator Assembly

Mitsubishi Alternator Part Number: 1800A428
Product Specifications- Other Name: Alternator Assembly, 120A
Mitsubishi Alternator
A Mitsubishi Alternator is designed to convert mechanical energy from the rotating engine into electrical energy applied to charge the electrical battery and power every essential device on the go. Founded in 1870 as a shipping operation, Mitsubishi quickly diversified into automobiles and built a tradition of making tough cars that blend practical size with smart features ordinary drivers enjoy. Mitsubishi's MIVEC engines respond smoothly, while Super All Wheel Control ensures surefooted handling. Cruise control is a convenient delight and smartphone links are intuitive for simple comfort and confidence. The company is involved in research programs that investigate hybrids, fuel cells, and small-scale test fleets. This indicates that they are keen on reducing emissions while keeping ownership uncomplicated. This is associated with a broader reputation for dependability and value. The design of the Alternator found throughout the lineup is in keeping with that philosophy. Using a two-piece aluminum shell, cooling is enhanced and corrosion is limited. A rotating rotor inside the stator generates alternating current, which is then converted into direct current by the built-in rectifier so that it can be applied by the battery and every circuit. An internal regulator varying the field current prevents undercharging and overcharging when the vehicle is under stop-and-go conditions or highway cruising. The shaft is held steady by precision front and rear bearings for quiet operation. Constant airflow through the casing ushers away heat so the Alternator can operate reliably mile after mile without getting noticed by the driver.
Pick genuine OEM Alternator if you want superb performance and durability that lasts. Mitsubishi builds that using high-grade materials and official factory techniques to meet very strict standards. This means you get parts you can actually trust for your daily drive. Finding the right parts is simple in the massive stock of genuine inventory. You can stop guessing if a part will fit or hold up. You will love the low prices, dependable service and the real manufacturer's warranty on Mitsubishi Alternator. Order today and the store will ship your brand-new items to your door as fast as possible.
Mitsubishi Alternator Parts Questions & Experts Answers
- Q: What features does the internal fan alternator have, and how does it function on Mitsubishi Lancer?A:The internal fan Mitsubishi alternator has a brush holder and an integral voltage regulator, with the voltage sensitive regulator controlling the charge rate according to battery condition. It consists of a stator enclosing a fixed coil winding, rotor having a shaft wound coil, rectifier or diode pack, and an IC regulator. The brushes on the slip rings feed an electrical current into the rotor windings, which generates a magnetic field in the rotor and produces three-phase alternating current (AC) in the star wound stator. The electrical output from the stator windings is rectified to direct current (DC) using a pack of diodes housed within the alternator slip ring end bracket as the storage batteries cannot be charged with AC. The output voltage is controlled by the internal characteristics of the integrated-circuit regulator and the alternator, with a non-adjustable voltage regulator. There's no need for an electrical cut out unit as the diodes stop reverse current. Precautions to take while servicing include that the battery should be connected with the negative terminal to earth, short circuit or grounding of terminals in charging circuit should be avoided, switching off the battery before plugging-on a charger, booster batteries in parallel should be connected and regular checking of drive belt and battery terminal is to be done. Follow these steps to test the alternator on the vehicle. If the warning lamp glows after starting the engine or the charge rate seems incorrect, turn off the engine. Next, Check the drive belt. Clean battery terminals. Finally, check that the battery is fully charged. Once you start the engine and achieve normal operating temperature, disconnect the negative lead from the battery; remove the alternator output lead; connect an ammeter and voltmeter to measure voltage and amperage output. Alternator's overhaul or replacement may be necessary if readings are out of specifications. To remove the alternator, disconnect the negative battery terminal and the wiring from it. Remove the drive belt. Then unbolt the alternator. The reverse sequence of disassembly was followed in the installation. Dis-assembly of alternator is a job which requires technical knowledge and special tools. It is usually better to get it repaired or exchange unit.

Related Mitsubishi Parts
 Mitsubishi Starter
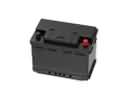 Mitsubishi Car Battery
 Mitsubishi Starter Solenoid
 Mitsubishi Voltage Regulator
 Mitsubishi Alternator Pulley
 Mitsubishi Alternator Bearing
 Mitsubishi Alternator Bracket
 Mitsubishi Battery Cable
 Mitsubishi Battery Hold Downs
 Mitsubishi Battery Sensor
 Mitsubishi Battery Tray
 Mitsubishi Ground Cables