×
- Hello
- Login or Register
- Quick Links
- Live Chat
- Track Order
- Parts Availability
- RMA
- Help Center
- Contact Us
- Shop for
- Mitsubishi Parts
My Garage
My Account
Cart
Genuine Mitsubishi Montero Clutch Release Bearing
Release Bearing- Select Vehicle by Model
- Select Vehicle by VIN
Select Vehicle by Model
orMake
Model
Year
Select Vehicle by VIN
For the most accurate results, select vehicle by your VIN (Vehicle Identification Number).
1 Clutch Release Bearing found

Mitsubishi Montero Release Bearing Part Number: MD703270
$94.04 MSRP: $130.62You Save: $36.58 (28%)Ships in 1-2 Business Days
Mitsubishi Montero Clutch Release Bearing
OEM Clutch Release Bearing can boast superior quality and long-term durability. Each part meets strict factory specs and passes careful checks in production. So you'll get Clutch Release Bearing with long-lasting strength and an exact fit. If you need OEM Mitsubishi Montero Clutch Release Bearing, the online store is the ideal place. The store carry a wide range of genuine Mitsubishi Montero parts at the highly competitive prices. You'll enjoy a simple and no-hassle shopping experience. You'll get unbeatable prices and fast delivery service. You'll get the manufacturer's warranty and a straightforward return policy. Shop with confidence and keep your car in top condition.
Mitsubishi Montero Clutch Release Bearing Parts Questions & Experts Answers
- Q: How to remove and install the Clutch Release Bearing on Mitsubishi Montero?A:To remove the unit, disconnect the negative cable from the battery first. Take off the gearbox next. Remove the spring clip(s) and slide the release bearing from the transmission input shaft. For cables models, drive out the two spring pins and slide the clutch control lever from the bellhousing, remove the release fork ensuring the pin slots are at right angles to the shaft when replaced. For hydraulically actuated versions, disengage the fork by pulling it straight off the ballstud. Grasp the bearing and rotate the inner part; if it does not rotate smoothly and is noisy, replace it. Clean the bearing thoroughly and check for damages, wear, and cracks. Do not immerse in solvent. For installation in cable-actuated models, clean the bushing of the control lever shaft in the bellhousing, and apply a thin coat of multi-purpose grease. Position the control lever/shaft assembly into place with the felt packings, return springs and clutch arm, engaging the return spring in clutch arm. You must install the spring pins with the slots at right angles to the shaft. Moreover, apply a few drops of clean engine oil to the felt packings. Place the release bearing and carrier assembly in position and install the spring clips to ensure that they are engaged. For hydraulically actuated designs, grease the ends of the clutch fork with moly-style grease and apply to the bearing inner diameter and the retaining ring and input bearing of the transmission. Fit the release bearing to the clutch fork so that the ends of the fork fit into the tabs of the bearing. Ensure that the spring clip remains seated. Lubricate the ball socket of the clutch release fork with moly-based disulphide grease. Push the fork onto the ball stud until firmly seated. Check the bearing to ensure it slides smoothly on the input shaft bearing retainer. In conclusion, reverse the disassembly process to complete the installation and tighten all bolts to their specified torques.
Related Mitsubishi Montero Parts
 Mitsubishi Montero Automatic Transmission Filter
 Mitsubishi Montero Automatic Transmission Seal
 Mitsubishi Montero Clutch Cable
 Mitsubishi Montero Clutch Fork
 Mitsubishi Montero Clutch Slave Cylinder
 Mitsubishi Montero Clutch Slave Repair Kit
 Mitsubishi Montero Flywheel
 Mitsubishi Montero Flywheel Ring Gear
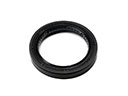 Mitsubishi Montero Output Shaft Seal
 Mitsubishi Montero Transfer Case Seal
 Mitsubishi Montero Transmission Pan