×
- Hello
- Login or Register
- Quick Links
- Live Chat
- Track Order
- Parts Availability
- RMA
- Help Center
- Contact Us
- Shop for
- Mitsubishi Parts
My Garage
My Account
Cart
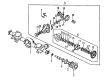
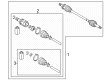
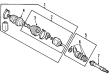
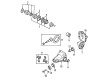
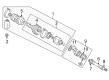
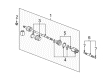
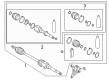
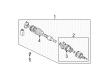
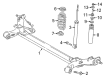
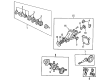
Genuine Mitsubishi Axle Shaft
Car Axle Shaft- Select Vehicle by Model
- Select Vehicle by VIN
Select Vehicle by Model
orMake
Model
Year
Select Vehicle by VIN
For the most accurate results, select vehicle by your VIN (Vehicle Identification Number).
94 Axle Shafts found


Mitsubishi Axle Shafts, Rear Part Number: 3715A397
$261.45 MSRP: $369.28You Save: $107.83 (30%)Ships in 1-2 Business DaysProduct Specifications- Other Name: Shaft Assembly, Rear Axle; Axle Shaft
- Position: Rear


Mitsubishi Axle Assembly, Passenger Side Part Number: 3815A358
$286.21 MSRP: $404.25You Save: $118.04 (30%)Ships in 1-2 Business DaysProduct Specifications- Other Name: Shaft Assembly, Front Axle Drive; Axle Shaft
- Position: Passenger Side

Mitsubishi Axle Shaft Part Number: MR196250
$312.07 MSRP: $440.78You Save: $128.71 (30%)Ships in 1-2 Business DaysProduct Specifications- Other Name: Shaft Assembly, Rear Axle; Axle Shafts

Mitsubishi Axle Assembly Part Number: 39600W090P
$318.23 MSRP: $449.48You Save: $131.25 (30%)Ships in 1-2 Business DaysProduct Specifications- Other Name: Shaft Assembly, Rear Axle, Left-Hand; Axle Shaft
- Replaces: 3715A389
Mitsubishi Axle Assembly Part Number: 3715A389
$318.23 MSRP: $449.48You Save: $131.25 (30%)Ships in 1-2 Business DaysProduct Specifications- Other Name: Shaft Assembly, Rear Axle, Left-Hand; Axle Shaft
- Replaced by: 39600W090P

Mitsubishi Axle Assembly, Driver Side Part Number: MN147043
$343.88 MSRP: $485.70You Save: $141.82 (30%)Ships in 1-2 Business DaysProduct Specifications- Other Name: Shaft Assembly, Front Axle Drive; CV Axle Assembly; GSP CV Axle; Axle Shaft
- Position: Driver Side
Mitsubishi Axle Assembly, Passenger Side Part Number: MR580732
$344.22 MSRP: $486.18You Save: $141.96 (30%)Ships in 1-2 Business DaysProduct Specifications- Other Name: Shaft Assembly, Front Axle Drive; CV Axle Assembly; GSP CV Axle; Axle Shaft
- Position: Passenger Side


Mitsubishi Axle Assembly, Passenger Side Part Number: MR980076
$344.34 MSRP: $486.35You Save: $142.01 (30%)Ships in 1-2 Business DaysProduct Specifications- Other Name: Shaft Assembly, Front Axle Drive; CV Axle Assembly; GSP CV Axle; Axle Shaft
- Position: Passenger Side

Mitsubishi Axle Assembly, Driver Side Part Number: 3815A043
$348.73 MSRP: $492.55You Save: $143.82 (30%)Ships in 1-2 Business DaysProduct Specifications- Other Name: Shaft Assembly, Front Axle Drive; Axle Shaft
- Position: Driver Side
Mitsubishi Axle Assembly, Driver Side Part Number: MR580361
$361.07 MSRP: $509.98You Save: $148.91 (30%)Ships in 1-2 Business DaysProduct Specifications- Other Name: Shaft Assembly, Front Axle Drive; CV Axle Assembly; GSP CV Axle; Axle Shaft
- Position: Driver Side

Mitsubishi Outer Joint Assembly, Driver Side Part Number: MN156839
$367.87 MSRP: $519.58You Save: $151.71 (30%)Ships in 1-2 Business DaysProduct Specifications- Other Name: Joint & Shaft Kit, Rear Axle; Axle Shaft; CV Joint; Axle Shafts
- Position: Driver Side

Mitsubishi Axle Assembly Part Number: MR581360
$387.19 MSRP: $546.88You Save: $159.69 (30%)Ships in 1-2 Business DaysProduct Specifications- Other Name: Shaft Assembly, Front Axle Drive; CV Axle Assembly; GSP CV Axle; Axle Shaft

Mitsubishi Axle Assembly, Passenger Side Part Number: MR980368
$388.70 MSRP: $549.02You Save: $160.32 (30%)Ships in 1-2 Business DaysProduct Specifications- Other Name: Shaft Assembly, Front Axle Drive; CV Axle Assembly; GSP CV Axle; Axle Shaft
- Position: Passenger Side

Mitsubishi Inner CV Joint, Passenger Side Part Number: 39218W260P
$425.98 MSRP: $601.67You Save: $175.69 (30%)Ships in 1-2 Business DaysProduct Specifications- Other Name: Joint Kit, Front Axle Shaft; Axle Shaft; CV Joint; Inner Joint
- Position: Passenger Side
- Replaces: 3817A525


Mitsubishi Inner CV Joint, Passenger Side Part Number: 39218W250P
$425.98 MSRP: $601.67You Save: $175.69 (30%)Ships in 1-2 Business DaysProduct Specifications- Other Name: Joint Kit, Front Axle Shaft; Axle Shaft; CV Joint; Inner Joint
- Position: Passenger Side
- Replaces: 3817A523
Mitsubishi Inner Joint, Driver Side Part Number: 39218W240P
$447.28 MSRP: $631.75You Save: $184.47 (30%)Ships in 1-2 Business DaysProduct Specifications- Other Name: Joint Kit, Front Axle Shaft; Axle Shaft; CV Joint; Inner CV Joint
- Position: Driver Side
- Replaces: 3817A505

Mitsubishi Axle Assembly, Driver Side Part Number: MR953745
$556.76 MSRP: $786.38You Save: $229.62 (30%)Ships in 1-2 Business DaysProduct Specifications- Other Name: Shaft Assembly, Front Axle Drive; CV Axle Assembly; GSP CV Axle; Axle Shaft
- Position: Driver Side

Mitsubishi Axle Assembly Part Number: 4120A150
$582.83 MSRP: $823.20You Save: $240.37 (30%)Ships in 1-2 Business DaysProduct Specifications- Other Name: Axle & Arm Assembly, Rear Suspension; Axle Shaft; Axle Beam

Mitsubishi Axle Assembly, Passenger Side Part Number: MR580508
$604.58 MSRP: $853.93You Save: $249.35 (30%)Ships in 1-2 Business DaysProduct Specifications- Other Name: Shaft Assembly, Rear Axle, Right-Hand; Axle Shaft
- Position: Passenger Side
Mitsubishi Axle Assembly, Driver Side Part Number: MR580507
$604.58 MSRP: $853.93You Save: $249.35 (30%)Ships in 1-2 Business DaysProduct Specifications- Other Name: Shaft Assembly, Rear Axle, Left-Hand; Axle Shaft
- Position: Driver Side
| Page 1 of 5 |Next >
1-20 of 94 Results
Mitsubishi Axle Shaft
The Mitsubishi Axle Shaft gives out engine power to each of the drive wheels. Moreover, it has splined ends and constant velocity joints that steady the torque. Further, it lets the suspension do its job height-wise to ground and lets the car corner without trouble. The Axle Shaft is a physical link from the differential to the wheel hub. Thus, the result is that every pulse of engine output goes straight to the ground. Smooth rotation is made possible by bearings. Dust is captured and lubricant trapped by seals while sudden impact twisting is avoided by high strength steel. Due to the design's balance of flexibility and rigidity, the Axle Shaft offers traction on rough roads without unwanted vibration to give drivers a quiet, predictable ride in any Mitsubishi vehicle. Throughout its lineup, Mitsubishi focuses on useful technology that makes your daily travels easy and enjoyable beyond the drivetrain. Since 1870, the company has been sending things across the oceans and soon adapting innovative ways to the Model A, Japan's first production car. Today, MIVEC engines deliver a combination of power and fuel savings while the Super All Wheel Control system enhances handling ability by transferring torque to the wheel where grip is limited. Motorists appreciate cruise control, smartphone integration, and trials of sophisticated safety sensors that inspect the road and alert of hazards. Through the use of hybrids and future fuel cell projects, Mitsubishi is demonstrating a long term commitment to efficiency, durability, and user friendly design, all of which will be a winning combination with the reliable mechanical design throughout its drivetrains.
Pick genuine OEM Axle Shaft if you want superb performance and durability that lasts. Mitsubishi builds that using high-grade materials and official factory techniques to meet very strict standards. This means you get parts you can actually trust for your daily drive. Finding the right parts is simple in the massive stock of genuine inventory. You can stop guessing if a part will fit or hold up. You will love the low prices, dependable service and the real manufacturer's warranty on Mitsubishi Axle Shaft. Order today and the store will ship your brand-new items to your door as fast as possible.
Mitsubishi Axle Shaft Parts Questions & Experts Answers
- Q: How to remove and install an Axle Shaft on Mitsubishi Galant?A:To remove the Axle Shaft, first loosen the front wheel lug nuts, raise the vehicle with a jack, and support it securely on jackstands before removing the wheel. Thereafter, discard the cotter pin from the hub nut and the defective old cotter pin, then remove the Axle Shaft/hub nut lock and spring washer. Loosen the Axle Shaft/hub bolt with a large socket and breaker bar. A prybar can be wedged between two wheel studs to stop the hub from turning. While it is not necessary to drain the transaxle lubricant, it may be wise if the mileage suggests the lubricant change is due. Remove the bolt and nut that secure the ball joint to the steering knuckle. Then pry the lower control arm downwards to separate. To loosen the Axle Shaft from mating splines on the hub, tap the Axle Shaft at its end with a soft-faced hammer; a puller may be required if stuck. Remove the Axle Shaft from the hub by pulling out on the steering knuckle, angling if needed, and then suspend the Axle Shaft outer end. Inspect the differential seal for lubricant leaks. A leak requires seal replacement after Axle Shaft removal. To remove the right-hand Axle Shaft from the V6 model, remove the center bearing bracket mounting bolts, support the Axle Shaft assembly and slide the intermediate shaft from the transaxle. On the four-cylinder model, pry the inner joint off the transaxle side gear shaft with a prybar, using the gearcase as a fulcrum. On the V6 model, pry off the left Axle Shaft inner joint using the same technique. Do not pull on the inner joint. While removing the Axle Shaft assembly, ensure the inner joint is not overextended and the axleshaft boots are undamaged. If it is essential to move the vehicle with the Axle Shaft out then a large bolt with washers must be placed through the hub and tightly fastened. In order to install it properly, on reversing the order of removal apply an even bead of multipurpose grease at the spline of the inner joint. When you install a Axle Shaft of a four-cylinder model, or a left Axle Shaft in a V6 model, hold the Axle Shaft straight out. Push it in sharply to seat the snap ring. Check for proper seating by pulling on the inner CV joint by hand. On 3.0L V6 models, the centre bearing bracket must be installed and bolts tightened to specification. Remove any contaminants from the thread of the Axle Shaft outer CV joint. Install the spring washer and nut. Tighten the hub nut to the specified torque. Install a new cotter pin and bend the ends of the pin over completely. To complete the task, fit the wheel and lug nuts. Lower the vehicle, tighten the lug nuts to specification, and add transaxle lubricant as necessary.

Related Mitsubishi Parts
 Mitsubishi CV Joint
 Mitsubishi Drive Shaft
 Mitsubishi Axle Shaft Seal
 Mitsubishi CV Boot
 Mitsubishi Differential Bearing
 Mitsubishi Differential Seal
 Mitsubishi Driveshaft Center Support Bearing
 Mitsubishi Driveshaft Yokes
 Mitsubishi Radius Arm Bushing
 Mitsubishi Ring And Pinion
 Mitsubishi Slip Yoke
 Mitsubishi Universal Joint