×
- Hello
- Login or Register
- Quick Links
- Live Chat
- Track Order
- Parts Availability
- RMA
- Help Center
- Contact Us
- Shop for
- Mitsubishi Parts
My Garage
My Account
Cart
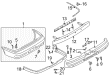
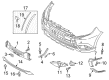
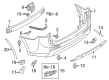
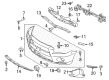
Genuine Mitsubishi Bumper
Bumper Fascia- Select Vehicle by Model
- Select Vehicle by VIN
Select Vehicle by Model
orMake
Model
Year
Select Vehicle by VIN
For the most accurate results, select vehicle by your VIN (Vehicle Identification Number).
Part Type
Select Part Type
177 Bumpers found

Mitsubishi Bumper Cover Part Number: MN161541
$243.54 MSRP: $797.58You Save: $554.04 (70%)Ships in 1-2 Business DaysProduct Specifications- Other Name: Face, Rear Bumper, Without Hole; Bumper

Mitsubishi Center Panel Part Number: 6400G762
$246.37 MSRP: $347.99You Save: $101.62 (30%)Ships in 1-2 Business DaysProduct Specifications- Other Name: Cover, Front Bumper; Bumper Cover; Bumper

Mitsubishi Impact Bar Part Number: 6410C519
$252.28 MSRP: $356.33You Save: $104.05 (30%)Ships in 1-2 Business DaysProduct Specifications- Other Name: Reinforcement, Rear Bumper; Bumper

Mitsubishi Impact Bar Part Number: 6400D229
$253.53 MSRP: $358.10You Save: $104.57 (30%)Ships in 1-2 Business DaysProduct Specifications- Other Name: Reinforcement, Front Bumper; Bumper; Reinforcement

Mitsubishi Bumper Cover Part Number: 6400B275
$258.42 MSRP: $364.00You Save: $105.58 (30%)Ships in 1-2 Business DaysProduct Specifications- Other Name: Face, Front Bumper; Bumper

Mitsubishi Lower Panel Silver Part Number: 6405A205HE
$262.97 MSRP: $371.44You Save: $108.47 (30%)Ships in 1-2 Business DaysProduct Specifications- Other Name: Extension, Front Bumper; Bumper Cover; Bumper

Mitsubishi Lower Panel Part Number: 6405A194
$265.38 MSRP: $374.83You Save: $109.45 (30%)Ships in 1-2 Business DaysProduct Specifications- Other Name: Extension, Front Bumper; Bumper Cover; Bumper

Mitsubishi Impact Bar Part Number: 6400C901
$269.88 MSRP: $381.18You Save: $111.30 (30%)Ships in 1-2 Business DaysProduct Specifications- Other Name: Reinforcement, Front Bumper; Bumper; Reinforcement

Mitsubishi Bumper Part Number: MR533016
$271.66 MSRP: $383.70You Save: $112.04 (30%)Ships in 1-2 Business DaysProduct Specifications- Other Name: Bumper, Rear Center
Mitsubishi Lower Panel Gray Met Part Number: 6405A205YA
$272.75 MSRP: $385.24You Save: $112.49 (30%)Ships in 1-2 Business DaysProduct Specifications- Other Name: Extension, Front Bumper; Bumper Cover; Bumper
Mitsubishi Lower Panel Black Part Number: 6405A205XA
$272.75 MSRP: $385.24You Save: $112.49 (30%)Ships in 1-2 Business DaysProduct Specifications- Other Name: Extension, Front Bumper; Bumper Cover; Bumper
Mitsubishi Lower Panel Red Part Number: 6405A205RA
$272.75 MSRP: $385.24You Save: $112.49 (30%)Ships in 1-2 Business DaysProduct Specifications- Other Name: Extension, Front Bumper; Bumper Cover; Bumper

Mitsubishi Lower Cover Silver Part Number: 85010W002P
$274.28 MSRP: $387.40You Save: $113.12 (30%)Ships in 1-2 Business DaysProduct Specifications- Other Name: Extension, Rear Bumper SIL; Bumper Cover; Bumper

Mitsubishi Impact Bar Part Number: 85032W040P
$274.29 MSRP: $387.42You Save: $113.13 (30%)Ships in 1-2 Business DaysProduct Specifications- Other Name: Reinforcement, Rear Bumper; Bumper

Mitsubishi Impact Bar Part Number: 6410F504
$275.34 MSRP: $388.90You Save: $113.56 (30%)Ships in 1-2 Business DaysProduct Specifications- Other Name: Reinforcement, Rear Bumper; Bumper

Mitsubishi Impact Bar Part Number: 5256C090
$283.03 MSRP: $399.76You Save: $116.73 (30%)Ships in 1-2 Business DaysProduct Specifications- Other Name: Reinforcement, Front Bumper; Bumper
Mitsubishi Lower Panel White Part Number: 6405A205WA
$287.75 MSRP: $406.43You Save: $118.68 (30%)Ships in 1-2 Business DaysProduct Specifications- Other Name: Extension, Front Bumper; Bumper Cover; Bumper
Mitsubishi Lower Panel Gray Part Number: 6405A205HB
$290.48 MSRP: $410.28You Save: $119.80 (30%)Ships in 1-2 Business DaysProduct Specifications- Other Name: Extension, Front Bumper; Bumper Cover; Bumper

Mitsubishi Impact Bar Part Number: 85030W120P
$293.29 MSRP: $414.25You Save: $120.96 (30%)Ships in 1-2 Business DaysProduct Specifications- Other Name: Reinforcement, Rear Bumper; Bumper

Mitsubishi Impact Bar Part Number: 6400H876
$293.44 MSRP: $414.47You Save: $121.03 (30%)Ships in 1-2 Business DaysProduct Specifications- Other Name: Reinforcement, Front Bumper; Bumper
| Page 1 of 9 |Next >
1-20 of 177 Results
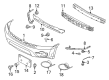
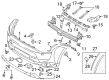
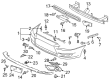
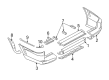
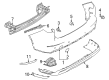
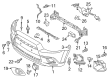
Mitsubishi Bumper
The Mitsubishi Bumper deflects the minor forces generated by crashing, preventing other panels from becoming damaged and people from getting injured. It is the first line of defense for each of these cars. The Bumper is made from strong materials while being lightweight at the same time. Furthermore, the Bumper sits on the front and rear edges and spreads energy across the reinforced sections. Moreover, it allows the repair bills to be low by protecting the lights, radiators, and suspension parts. The precise configuration sharpens the appearance of each vehicle while maintaining their factory alignment, allowing the owner to switch out a damaged Bumper quickly without extra drilling. Mitsubishi, as a brand, has a long history of development yet a forward-looking perspective. Having brought out its initial automobile more than a century ago, Mitsubishi has coupled MIVEC engines with the ability to squeeze out more power from less fuel, Super All Wheel Control that confidently grips onto loose gravel, and user-friendly tech like cruise control and smartphone link that turn road trip fun into simple tap and go accomplishments. The company also offers plug-in hybrid models and trials with fuel cell systems demonstrating its desire for convenient yet cleaner travel. Every model features smart sensors that monitor traffic and alert the driver, while the simple layouts are easy to learn within minutes for novice drivers. The dependable character traits of the protective part already mentioned in the brand description imply that the brand seeks durability, safety, and ease from the first weld in the frame to the last click of a protective clip.
Pick genuine OEM Bumper if you want superb performance and durability that lasts. Mitsubishi builds that using high-grade materials and official factory techniques to meet very strict standards. This means you get parts you can actually trust for your daily drive. Finding the right parts is simple in the massive stock of genuine inventory. You can stop guessing if a part will fit or hold up. You will love the low prices, dependable service and the real manufacturer's warranty on Mitsubishi Bumper. Order today and the store will ship your brand-new items to your door as fast as possible.
Mitsubishi Bumper Parts Questions & Experts Answers
- Q: How to remove the front and rear bumpers on Mitsubishi Galant?A:To detach the front bumper, the process begins by opening the hood and propping it up. After that, unbolt the radiator grille and remove the fasteners that secure the front fender inner splash shields to the bottom of the bumper cover. Pull back the splash shields from the fenderwell as necessary to locate the bolts that secure the bumper cover to the front fender. If applicable, disconnect fog light wiring harness connectors and remove fog light assemblies. After that, remove the hardware from the upper and lower parts of the bumper cover, then remove the bumper cover from the vehicle. If removing the bumper cover, lay down blankets or suitable padding on the ground so when it falls, the paint is not damaged. At the present stage, the bumper reinforcement can also be removed, if necessary. To install, carry on reverse order of dismantling. To remove the rear bumper cover, open the trunk lid and remove the trunk trim fasteners to access the inner body-to-bumper cover fasteners. Remove the bumper cover body retaining nuts and the lower bumper cover fasteners. To remove the bumper cover from the vehicle, slide it rearward using blankets or padding to shield the paint if you are alone. Bumper reinforcement can be removed as needed. To install, reverse the removal order.
- Q: How to remove and install the front and rear bumpers on Mitsubishi Lancer?A:In the case of CE models you need to raise the bonnet and remove both turn signal lamps and further remove the bumper clips retaining the bumper to the body. If fog lamps are fitted, disconnect the wiring from the backs of the lamps, then in the wheel arch, remove the retaining clip on the splashguard and the screw at the top corner of the bumper, repeating on the other side. With assistance, unclip the clips at the front of the bumper under the car, remove the retaining bolts from the chassis rails and pull the bumper forwards. If required, detach the retaining clips and remove the bumper from the bracket. To install the bumper, simply follow the removal procedure in reverse. This will ensure the bumper is installed correctly, with all clips and wiring connected. To access the clips retaining the bottom of the bumper to the radiator support bracket, the front of the vehicle needs to be raised and supported on jack stands for CG and CH models. If fog lamps are fitted, unplug the wiring from the rear. Within the wheel arch, detach the clips holding the inner guard liner as well as the screw on the bumper top. With some help, detach the clips securing the bumper to the radiator support bracket and pull the bumper forward. When fitting the lamp, ensure that the clips and screws are secured and the wiring is reconnected. To install rear bumper on CE models, work under the bumper to take out the many clips that hold it to the body, then in the wheelarch take out the screws that hold the mud-flaps and the clip on the splashguard, repeating on the other side. Take away the retaining bolt at the top corner of the bumper on each side, then inside the vehicle remove the trim necessary to access the bumper retaining nuts and bolts. On Hatchback variants, first disconnect the wiring of number plate lamp and feed it through the body towards the bumper. Now with assistance withdraw the bumper. To install, reverse the removal procedure and securely tighten all fasteners. Finally on Hatchback models, connect the wiring to the number plate lamps. For CG and CH models, the removal of screws retaining mud-flaps and their clip on splashguard as well as the screw retaining the top of the bumper to the rear guard is a similar procedure done to drop the rear bumper. Take out the rear tail lamps assembly and accessible screws prior to arriving at the bumper retaining screws inside the vehicle. If your car has after-market reverse parking sensors, trace their wiring to find where it was spliced with the wiring harness and disconnect it; or simply remove the sensors and then with an assistant, pull off the bumper. To install components, perform removal operations in reverse order. Ensure all fasteners are securely tightened. Reconnect harness wiring. Install tail lamp assemblies.


Related Mitsubishi Parts
 Mitsubishi Emblem
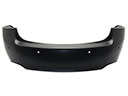 Mitsubishi Bumper Cover
 Mitsubishi License Plate
 Mitsubishi Front Cross-Member
 Mitsubishi Tachometer
 Mitsubishi Body Mount Hole Plug
 Mitsubishi Car Mirror
 Mitsubishi Cup Holder
 Mitsubishi Headlight Screws
 Mitsubishi Mirror Actuator
 Mitsubishi Seat Heater Switch
 Mitsubishi Weather Strip