×
- Hello
- Login or Register
- Quick Links
- Live Chat
- Track Order
- Parts Availability
- RMA
- Help Center
- Contact Us
- Shop for
- Mitsubishi Parts
My Garage
My Account
Cart
Genuine Mitsubishi Galant Clutch Release Bearing
Release Bearing- Select Vehicle by Model
- Select Vehicle by VIN
Select Vehicle by Model
orMake
Model
Year
Select Vehicle by VIN
For the most accurate results, select vehicle by your VIN (Vehicle Identification Number).
2 Clutch Release Bearings found

Mitsubishi Galant Release Bearing Part Number: MD722744
$66.05 MSRP: $91.74You Save: $25.69 (28%)Ships in 1-2 Business DaysMitsubishi Galant Release Bearing Part Number: MD749998
$44.09 MSRP: $61.23You Save: $17.14 (28%)Ships in 1-2 Business Days
Mitsubishi Galant Clutch Release Bearing
OEM Clutch Release Bearing can boast superior quality and long-term durability. Each part meets strict factory specs and passes careful checks in production. So you'll get Clutch Release Bearing with long-lasting strength and an exact fit. If you need OEM Mitsubishi Galant Clutch Release Bearing, the online store is the ideal place. The store carry a wide range of genuine Mitsubishi Galant parts at the highly competitive prices. You'll enjoy a simple and no-hassle shopping experience. You'll get unbeatable prices and fast delivery service. You'll get the manufacturer's warranty and a straightforward return policy. Shop with confidence and keep your car in top condition.
Mitsubishi Galant Clutch Release Bearing Parts Questions & Experts Answers
- Q: How to remove the transaxle to replace the Clutch Release Bearing and access the Clutch Fork on Mitsubishi Galant?A:For release bearing replacement, it is best to repeatedly change the release bearing along with the clutch components as the removal of the transaxle is not easy. Start by removing the cable from the battery's negative terminal. Remove the transaxle next. Arrange the lever and bearing such that the lever is perpendicular to the input shaft. Remove the bearing from the lever by pulling the ends of the spring clip out of the holes in the Clutch Fork. Push the Clutch Fork away from the input shaft, disengaging it from the ballstud. Avoid using a screwdriver or prybar, as this may damage the spring clip. Remove the release bearing off the input shaft. To inspect a bearing, hold it by the outer race. While you apply pressure to the outer race of the bearing, rotate the inner race. If it does not rotate smoothly or is noisy, you need to replace it. It does not matter if the bearing looks fine or not. Clean the bearing and inspect for any damage, wear, and cracks, avoiding any immersion in solvent, which is sealed for life. Furthermore, check the Clutch Fork and fork for cracks or bends. Ensure the pivot ballstud and stud pocket in the release fork are clean. To install the Clutch Fork, apply a thin layer of high-temperature grease on the ends of the Clutch Fork, the inner diameter of the release bearing, and the input shaft. Replace the Clutch Fork and bearing on the transaxle.
Related Mitsubishi Galant Parts
 Mitsubishi Galant Automatic Transmission Filter
 Mitsubishi Galant Automatic Transmission Seal
 Mitsubishi Galant Automatic Transmission Shift Indicator
 Mitsubishi Galant Automatic Transmission Shift Levers
 Mitsubishi Galant Clutch Fork
 Mitsubishi Galant Clutch Master Cylinder
 Mitsubishi Galant Clutch Slave Cylinder
 Mitsubishi Galant Clutch Slave Repair Kit
 Mitsubishi Galant Flywheel Ring Gear
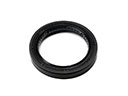 Mitsubishi Galant Output Shaft Seal
 Mitsubishi Galant Transfer Case Seal
 Mitsubishi Galant Transmission Assembly