×
- Hello
- Login or Register
- Quick Links
- Live Chat
- Track Order
- Parts Availability
- RMA
- Help Center
- Contact Us
- Shop for
- Mitsubishi Parts
My Garage
My Account
Cart
Genuine Mitsubishi Diamante Instrument Panel Light Bulb
- Select Vehicle by Model
- Select Vehicle by VIN
Select Vehicle by Model
orMake
Model
Year
Select Vehicle by VIN
For the most accurate results, select vehicle by your VIN (Vehicle Identification Number).
1 Instrument Panel Light Bulb found

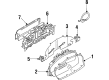
Mitsubishi Diamante Bulb Part Number: MB066068
$2.38 MSRP: $3.10You Save: $0.72 (24%)Ships in 1-2 Business Days
Mitsubishi Diamante Instrument Panel Light Bulb
OEM Instrument Panel Light Bulb can boast superior quality and long-term durability. Each part meets strict factory specs and passes careful checks in production. So you'll get Instrument Panel Light Bulb with long-lasting strength and an exact fit. If you need OEM Mitsubishi Diamante Instrument Panel Light Bulb, the online store is the ideal place. The store carry a wide range of genuine Mitsubishi Diamante parts at the highly competitive prices. You'll enjoy a simple and no-hassle shopping experience. You'll get unbeatable prices and fast delivery service. You'll get the manufacturer's warranty and a straightforward return policy. Shop with confidence and keep your car in top condition.
Mitsubishi Diamante Instrument Panel Light Bulb Parts Questions & Experts Answers
- Q: How to remove and install Instrument Panel Light Bulb, Side Marker Light and Turn Signal Lights (parking and side marker lights) on Mitsubishi Diamante?A:In order to remove and install parking and side marker lights, first disconnect the negative battery cable then access the bulbs by finding and removing any required components. In the case of the bulb sockets, one has to rotate it anti clockwise to remove, hold the bulb and pull it straight out. The opposite of removing is installation. In front turn signals, once the negative battery cable has been disconnected, remove the two retaining screws in the lens and remove the lens then rotate the bulb socket counterclockwise to take off. Draw the bulb out and repeat the process to install. To access the rear lamp assembly, the negative battery cable, trunk, retainers, and inner trim panel should be disconnected to access the rear turn signals, rear brake, and tail lights. Unscrew the bulb and socket set, extract it, squeeze the bulb and twist it to change it and vice versa. To back-up lights, unhook the negative battery cable, open the trunk, and trim (where available). To loosen the socket, one turns the socket counterclockwise to unlock, removes the bulb and repeats the steps to install and to reconnect the negative battery cable and to test the lamp is working. In case of side marker lights, loosen the retaining screws of the lens, remove the lens, counterclockwisely rotate the bulb socket to loosen it, pull out the bulb and vice versa. On high-mount brake lights on other models, to remove the lamp assembly, disconnect the negative battery cable, remove the lamp assembly off the trunk, remove the electrical connector, retaining screw, lower the lamp assembly, and rotate the bulb clockwise to remove it, and vice versa. In the case of license plate lights, do not connect the negative battery cable, screw out the lamp lens, lower the lens, and then take the bulb out of the terminals and install the new bulb and lens screwing the screws back in and reconnecting the negative battery cable. In the case of dome/passenger area lamps, it is important to take the cover off, remove the bulb, clean the contacts, place in the new one, switch it to test functionality and replace the cover. In the case of instrument cluster light bulbs, disconnect the negative battery cable, take off the instrument cluster, turn the bulb socket in a counterclockwise motion to take out the bulb, pull the bulb out, replace it with a new bulb (where applicable), replace the socket, replace the instrument cluster, and reconnect the negative battery cable.
Related Mitsubishi Diamante Parts
 Mitsubishi Diamante Car Bulbs
 Mitsubishi Diamante Flasher Relay
 Mitsubishi Diamante Fuse
 Mitsubishi Diamante Ignition Coil
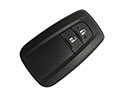 Mitsubishi Diamante Key Fob
 Mitsubishi Diamante Neutral Safety Switch
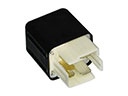 Mitsubishi Diamante Overload Relay
 Mitsubishi Diamante Relay
 Mitsubishi Diamante Relay Block
 Mitsubishi Diamante Spark Plug Wire
 Mitsubishi Diamante Starter Relay
 Mitsubishi Diamante Temperature Sender