×
- Hello
- Login or Register
- Quick Links
- Live Chat
- Track Order
- Parts Availability
- RMA
- Help Center
- Contact Us
- Shop for
- Mitsubishi Parts
My Garage
My Account
Cart
Genuine Mitsubishi Diamante Spark Plug Wire
Spark Plug Ignition Wires- Select Vehicle by Model
- Select Vehicle by VIN
Select Vehicle by Model
orMake
Model
Year
Select Vehicle by VIN
For the most accurate results, select vehicle by your VIN (Vehicle Identification Number).
2 Spark Plug Wires found

Mitsubishi Diamante Cable Set Part Number: MD156560
$130.34 MSRP: $176.63You Save: $46.29 (27%)Ships in 1-2 Business DaysMitsubishi Diamante Cable Set Part Number: MD193980
$144.56 MSRP: $195.88You Save: $51.32 (27%)Ships in 1-2 Business Days
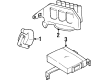
Mitsubishi Diamante Spark Plug Wire
OEM Spark Plug Wire can boast superior quality and long-term durability. Each part meets strict factory specs and passes careful checks in production. So you'll get Spark Plug Wire with long-lasting strength and an exact fit. If you need OEM Mitsubishi Diamante Spark Plug Wire, the online store is the ideal place. The store carry a wide range of genuine Mitsubishi Diamante parts at the highly competitive prices. You'll enjoy a simple and no-hassle shopping experience. You'll get unbeatable prices and fast delivery service. You'll get the manufacturer's warranty and a straightforward return policy. Shop with confidence and keep your car in top condition.
Mitsubishi Diamante Spark Plug Wire Parts Questions & Experts Answers
- Q: How to check a spark plug wire's resistance and ensure proper installation on Mitsubishi Diamante?A:The simplest way to check plug wire resistance is to use an ohmmeter and measure the wire through the distributor cap and then each one individually. Every Service or Inspection. Visually check the spark plug cables for burns, cuts or breaks in the insulation. Check the boots and nipples on the distributor cap or coil for damage. Replace damaged cable. At 50,000 miles or 60 months, measure the resistance of the wires. Excessive resistance can cause misfire and starting problems in wet conditions. Use an ohmmeter to measure resistance on each wire between the end connectors, removing and replacing each wire one at a time. The resistance should be in 4,000 to 6,000 ohms per foot, this is calculated by taking the wires out of the plugs and the coil pack and just measuring from the ends. This should not exceed maximum allowable value. Whenever high tension wires removed ensure to apply silicone grease to boot before reconnecting. To remove them, first the spark plug wires from the distributor cap or coil pack and wire dividers. Next, remove the air cleaner inlet tube and the center cover from the valve cover, if necessary. Be sure to note the routing of the spark plug wires and label them accordingly. If they are not in the right place, misfiring and surging will occur. First remove the longest wire from the spark plug, then from the coil pack or distributor cap. When installing, use any wires as replacements for the old ones. Apply dielectric grease to the boots and terminals. Ensure the wire snaps in place as you continue with the same routing. Do this for every wire, starting with the longest and subsequently the shortest, followed by reinstalling the air cleaner inlet tube.
Related Mitsubishi Diamante Parts
 Mitsubishi Diamante ABS Relay
 Mitsubishi Diamante Car Bulbs
 Mitsubishi Diamante Cruise Control Switch
 Mitsubishi Diamante Distributor Rotor
 Mitsubishi Diamante Fuse
 Mitsubishi Diamante Ignition Coil
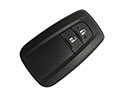 Mitsubishi Diamante Key Fob
 Mitsubishi Diamante Neutral Safety Switch
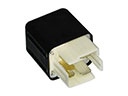 Mitsubishi Diamante Overload Relay
 Mitsubishi Diamante Relay
 Mitsubishi Diamante Starter Relay
 Mitsubishi Diamante Temperature Sender