×
- Hello
- Login or Register
- Quick Links
- Live Chat
- Track Order
- Parts Availability
- RMA
- Help Center
- Contact Us
- Shop for
- Mitsubishi Parts
My Garage
My Account
Cart
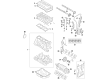
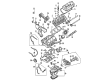
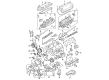
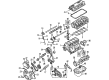
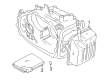
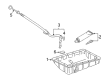
Genuine Mitsubishi Oil Pan
Oil Drain Pan- Select Vehicle by Model
- Select Vehicle by VIN
Select Vehicle by Model
orMake
Model
Year
Select Vehicle by VIN
For the most accurate results, select vehicle by your VIN (Vehicle Identification Number).
36 Oil Pans found

Mitsubishi Oil Pan Part Number: 1200A394
$244.68 MSRP: $345.60You Save: $100.92 (30%)Ships in 1-2 Business DaysProduct Specifications- Other Name: Oil Pan, Engine

Mitsubishi Oil Pan Part Number: MN187235
$265.25 MSRP: $374.66You Save: $109.41 (30%)Ships in 1-2 Business DaysProduct Specifications- Other Name: Oil Pan, Engine; Engine Oil Pan

Mitsubishi Oil Pan Part Number: MD350318
$270.10 MSRP: $381.50You Save: $111.40 (30%)Ships in 1-2 Business DaysProduct Specifications- Other Name: Oil Pan, Engine, Upper

Mitsubishi Oil Pan Part Number: 1200A055
$310.62 MSRP: $438.73You Save: $128.11 (30%)Ships in 1-2 Business DaysProduct Specifications- Other Name: Oil Pan, Engine; Engine Oil Pan

Mitsubishi Oil Pan Part Number: MN187643
$316.38 MSRP: $446.87You Save: $130.49 (30%)Ships in 1-2 Business DaysProduct Specifications- Other Name: Oil Pan, Engine, Upper

Mitsubishi Oil Pan Part Number: MD374966
$333.85 MSRP: $471.54You Save: $137.69 (30%)Ships in 1-2 Business DaysProduct Specifications- Other Name: Oil Pan, Engine; Engine Oil Pan


Mitsubishi Upper Oil Pan Part Number: 1200A481
$405.31 MSRP: $572.47You Save: $167.16 (30%)Ships in 1-2 Business DaysProduct Specifications- Other Name: Oil Pan, Engine, Upper; Oil Pan

Mitsubishi Upper Oil Pan Part Number: MQ718900
$515.91 MSRP: $728.67You Save: $212.76 (30%)Ships in 1-2 Business DaysProduct Specifications- Other Name: Oil Pan, Engine, Upper; Oil Pan

Mitsubishi Oil Pan Part Number: 1200A008
$526.39 MSRP: $743.48You Save: $217.09 (30%)Ships in 1-2 Business DaysProduct Specifications- Other Name: Oil Pan, Engine, Upper

Mitsubishi Oil Pan Part Number: MD369654
$46.38 MSRP: $64.42You Save: $18.04 (28%)Ships in 1-2 Business DaysProduct Specifications- Other Name: Oil Pan, Engine, Lower; Engine Oil Pan

Mitsubishi Lower Oil Pan Part Number: 1200A773
$48.19 MSRP: $66.93You Save: $18.74 (28%)Ships in 1-2 Business DaysProduct Specifications- Other Name: Oil Pan, Engine, Lower; Oil Pan
Mitsubishi Oil Pan Part Number: MD347349
$51.49 MSRP: $71.52You Save: $20.03 (29%)Ships in 1-2 Business DaysProduct Specifications- Other Name: Oil Pan, Engine, Lower

Mitsubishi Baffle Plate Part Number: 1200A274
$58.19 MSRP: $80.82You Save: $22.63 (28%)Ships in 1-2 Business DaysProduct Specifications- Other Name: Plate, Engine Oil Pan Baffle; Oil Pan Baffle; Oil Pan

Mitsubishi Oil Pan Part Number: MR994049
$63.92 MSRP: $88.79You Save: $24.87 (29%)Ships in 1-2 Business DaysProduct Specifications- Other Name: Oil Pan, Engine, Lower; Engine Oil Pan; Lower Oil Pan

Mitsubishi Oil Pan Part Number: MR994042
$71.33 MSRP: $99.07You Save: $27.74 (28%)Ships in 1-2 Business DaysProduct Specifications- Other Name: Oil Pan, Engine, Lower; Engine Oil Pan; Lower Oil Pan

Mitsubishi Lower Oil Pan Part Number: 1200A318
$79.28 MSRP: $110.11You Save: $30.83 (28%)Ships in 1-2 Business DaysProduct Specifications- Other Name: Oil Pan, Engine, Lower; Engine Oil Pan; Oil Pan

Mitsubishi Transmission Pan Part Number: MR983409
$83.54 MSRP: $116.03You Save: $32.49 (28%)Ships in 1-2 Business DaysProduct Specifications- Other Name: Oil Pan, Automatic Transmission Case; Oil Pan

Mitsubishi Lower Oil Pan Part Number: MQ718238
$183.25 MSRP: $248.30You Save: $65.05 (27%)Ships in 1-2 Business DaysProduct Specifications- Other Name: Oil Pan, Engine, Lower; Oil Pan

Mitsubishi Transmission Pan Part Number: 2705A044
$190.17 MSRP: $257.68You Save: $67.51 (27%)Ships in 1-2 Business DaysProduct Specifications- Other Name: Oil Pan, Automatic Transmission Case; Oil Pan

Mitsubishi Oil Pan Part Number: MD332039
$192.68 MSRP: $261.08You Save: $68.40 (27%)Ships in 1-2 Business DaysProduct Specifications- Other Name: Oil Pan, Engine
| Page 1 of 2 |Next >
1-20 of 36 Results
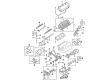
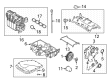
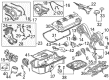
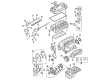
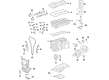
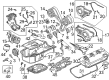
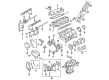
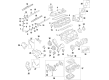
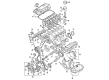
Mitsubishi Oil Pan
Mitsubishi Oil Pan houses and protects engine oil and holds an adequate supply for distribution to the engine when required to keep it cool and lubricated. The Oil Pan, which is low-lying under the engine block, receives the return flow of oil due to gravity. After the oil reduces friction, the Oil Pan's sealed body also prevents leaks from taking place. The internal shape provides sufficient volume without hindering cross members, and a convenient drain hole allows grease to leave quickly during service. The metal casing furthermore assists in protecting the pool from stones and road spray, helping keep the engine cleaner over thousands of miles. Since all gasoline passenger vehicles in the lineup share the wet sump philosophy, the Oil Pan offers group value to the entire brand. Combined with this reliable hardware, Mitsubishi builds vehicles that combine reliability and intelligent technology. The lightweight MIVEC engine makes for lively power with great fuel economy, while the Super All Wheel Control system enhances grip on gravel or snow. The available plug-in hybrid systems also deliver the quiet electric cruising power required for daily errands. Safety sensors play an important role in braking and lane keeping while a cruise control feature makes long drives easy. Additionally, a smartphone link allows the driver to stream music or check maps without any hassle. Mitsubishi believes that with each component designed for simplicity of handling and endurance to withstand the test of time, ownership issues are kept to a minimum. Drivers are therefore able to enjoy confident performance during commutes or when it comes to exploring new avenues. This balanced approach shows that the brand takes equal importance in performance and practicality.
Pick genuine OEM Oil Pan if you want superb performance and durability that lasts. Mitsubishi builds that using high-grade materials and official factory techniques to meet very strict standards. This means you get parts you can actually trust for your daily drive. Finding the right parts is simple in the massive stock of genuine inventory. You can stop guessing if a part will fit or hold up. You will love the low prices, dependable service and the real manufacturer's warranty on Mitsubishi Oil Pan. Order today and the store will ship your brand-new items to your door as fast as possible.
Mitsubishi Oil Pan Parts Questions & Experts Answers
- Q: How to remove and reinstall an oil pan in the four-cylinder engine on Mitsubishi Galant?A:In order to take out the oil pan, you have to, first, unscrew the cable off the neg battery terminal, and then place the vehicle at an elevated position and make sure you have jackstands in place. Empty the engine oil and take out the front exhaust pipe. The next step entails removing the flywheel/driveplate inspection cover, then the mounting bolts to get the oil pan off of the vehicle, with a criss-cross pattern to loosen and remove the bolts. When pan is stuck, tap the pan lightly with a soft face hammer or a piece of wood to prevent any harm to the gasket surface. Then take out the oil pump pick-up tube and screen assembly cleaning them both thoroughly before reassembling and replace with a new seal. Wipe off oil pan and sealing surfaces on the block and pan, remove all old gasket material, check distortion, straightening or replacing as necessary. To install, place a bead of RTV sealant 1/8 inch at the joint of the cylinder block-to-oil pump assembly and replace the oil pan gasket. Place the oil pan, and screw in the bolts on a finger tight, then tighten them side to side with the center to the required tightness. Lastly, replace crankcase with the appropriate oil, start the engine to ensure there are no leakages and also perform road test to ascertain that there are no leakages.
- Q: How to remove and install the Oil Pan and related engine components as described in the paragraph on Mitsubishi Lancer?A:To remove and install, first raise the front of the vehicle and support it securely on jack stands. Remove the bolts and scrivets retaining the right-hand side splashguard and withdraw the guard from the vehicle. Drain the engine oil into a suitable container if necessary, install a new O-ring to the drain plug, and tighten the plug to the specified torque. Remove the nuts retaining the engine pipe to the exhaust manifold, the retaining bolt to the bracket on the engine block, the two flange bolts at the catalytic converter, and both exhaust mounts to take out the front engine pipe. For models with air conditioning, remove the bolts retaining the air conditioning compressor to the bracket on the cylinder block and suspend the compressor with the hoses still attached using wire or rope. Next, remove the bolts retaining the air conditioning compressor support bracket to the cylinder block and withdraw the bracket from the engine compartment. If fitted, remove the bolts retaining the engine brace between the engine and transaxle, then remove the cover plate from between the Oil Pan and transmission. Remove the bolts retaining the Oil Pan to the cylinder block, ensuring to remove the lower Oil Pan bolt first on 2.0 litre models. Caution is advised on 2.0 litre models to avoid using a knife or seal cutter to separate the lower Oil Pan from the upper Oil Pan, as the upper Oil Pan is made of alloy and can be easily damaged; instead, use a rubber mallet to tap the lower Oil Pan along the side to break the seal. For all models except the 2.0 litre, with all retaining bolts removed, cut the bead of sealant between the cylinder block and Oil Pan using a sealant cutter or sharp knife, taking care not to damage the oil pump housing or any alloy components. On 2.0 litre models, remove the remaining bolts that retain the upper Oil Pan to the engine, using leveraging points to separate the upper Oil Pan from the engine. If required and where fitted, remove the bolts retaining the baffle plate inside the Oil Pan and remove the Oil Pan. If necessary, remove the bolts retaining the oil pump pickup pipe and withdraw the pipe from the engine compartment, discarding the gasket. Installation is a reversal of the removal procedure with attention to thoroughly cleaning the mating surfaces of the cylinder block and the Oil Pan, using a scraper or razor blade to remove old sealant, and cleaning the Oil Pan mating face with a solvent that will not leave a residue. Clean the oil pump pickup screen with solvent and blow dry with compressed air, checking the oil pump pickup for cracking, clogging, or other damage, as well as checking the Oil Pan for cracks and distortion or damage to the sealing surface, renewing components as necessary. If removed, install the baffle plate to the Oil Pan and tighten the bolts to the specified torque, then install the oil pump pickup if it was removed. Apply a 4 mm wide bead of Loctite Blue Maxx or equivalent sealant to the Oil Pan mating surface, and place the Oil Pan onto the cylinder block, installing the retaining bolts and tightening them to the specified torque, following the correct tightening order for the respective models. Remove all traces of the sealant squeezed out on the flywheel side of the Oil Pan, and for 2.0 litre models, install the lower Oil Pan to the upper Oil Pan using the same procedure. Install the air conditioning compressor bracket and the compressor, then refill the engine using the specified grade and quantity of engine oil, waiting at least 30 minutes to allow the sealant to cure before filling the Oil Pan with engine oil. Finally, start the engine and ensure that the oil pressure warning lamp extinguishes after a short period, checking for oil leaks and rectifying as necessary.


Related Mitsubishi Parts
 Mitsubishi Oil Filter
 Mitsubishi Timing Belt
 Mitsubishi Crankshaft
 Mitsubishi Knock Sensor
 Mitsubishi Cylinder Head Gasket
 Mitsubishi Crankshaft Gear
 Mitsubishi Engine Mount
 Mitsubishi Engine Mount Bracket
 Mitsubishi Oil Pan Baffle
 Mitsubishi Piston Ring Set
 Mitsubishi Rocker Arm
 Mitsubishi Valve Spring Retainer